SP1과 친해지기: zkVM 이야기
28 Aug 2024 | Zero-KnowledgeSP1
Overview
https://docs.succinct.xyz/ 문서를 참조하여 실습 및 내용 요약 내용을 작성한 문서입니다.
Getting Started
Installation
Requirements
Install from prebuilt binaries
curl -L https://sp1.succinct.xyz | bash
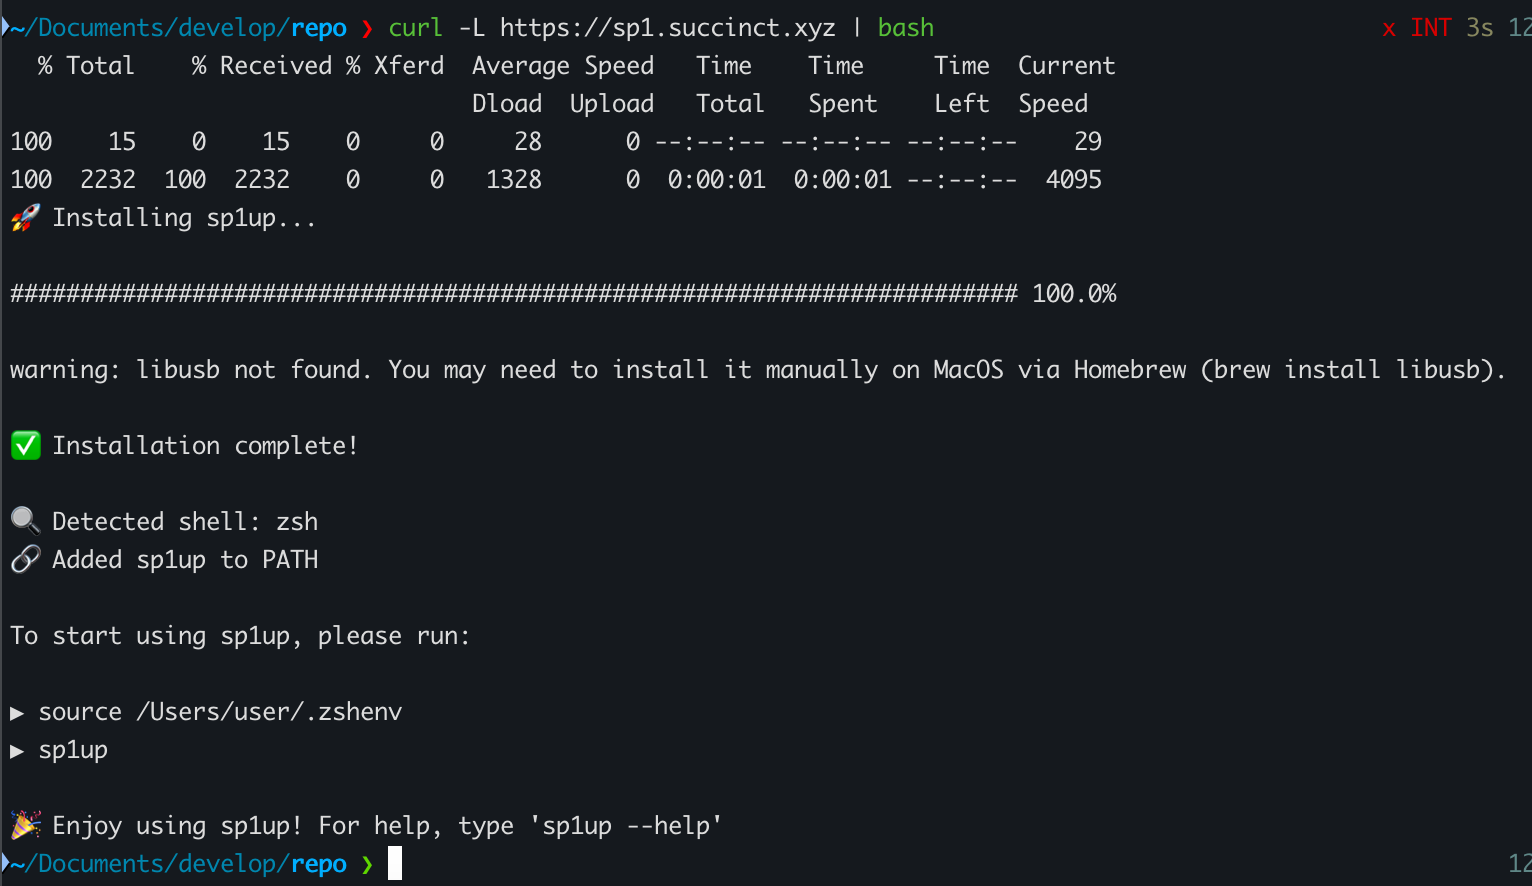
위 명령어를 이용하여 정상적으로 실행했다면 아래 명령어를 통해 toolchain을 설치할 수 있다.
sp1up
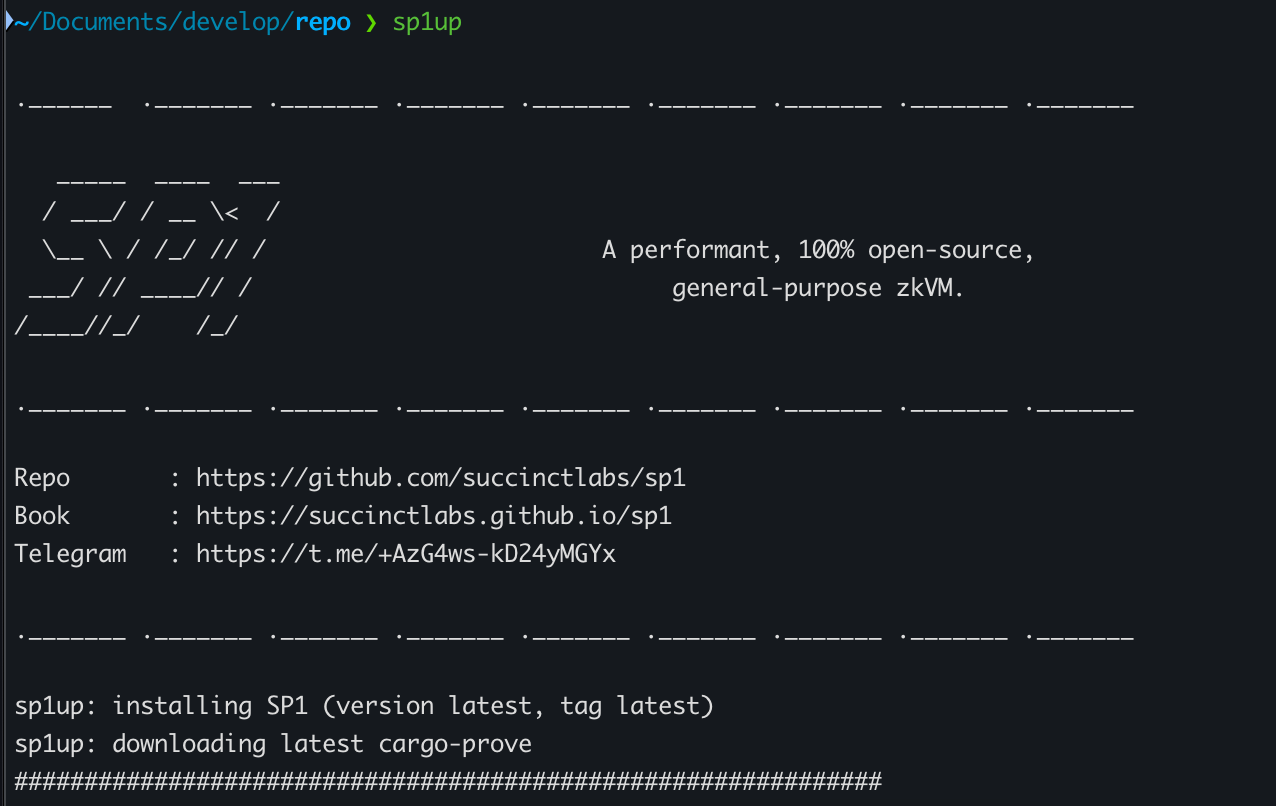
위 명령어는 두 가지 항목을 설치하는데
succicntriscv32im-succinct-zkvm-elf 컴파일을 지원하는 간단한 toolchaincargo provesp1 관련 command를 제공하는 CLI tool
CLI tool에 대한 설치는 아래 명령어로 확인할 수 있다.
cargo prove --version

Succinct Rust toolchain에 대한 설치는 아래 명령어 중 하나를 수행하여 확인할 수 있다.
RUSTUP_TOOLCHAIN=succinct cargo --version
cargo +succinct --version

Create an SP1 Project
Option 1
Using cargo prove CLI
cargo prove new <name>

Option 2
Clone template repository
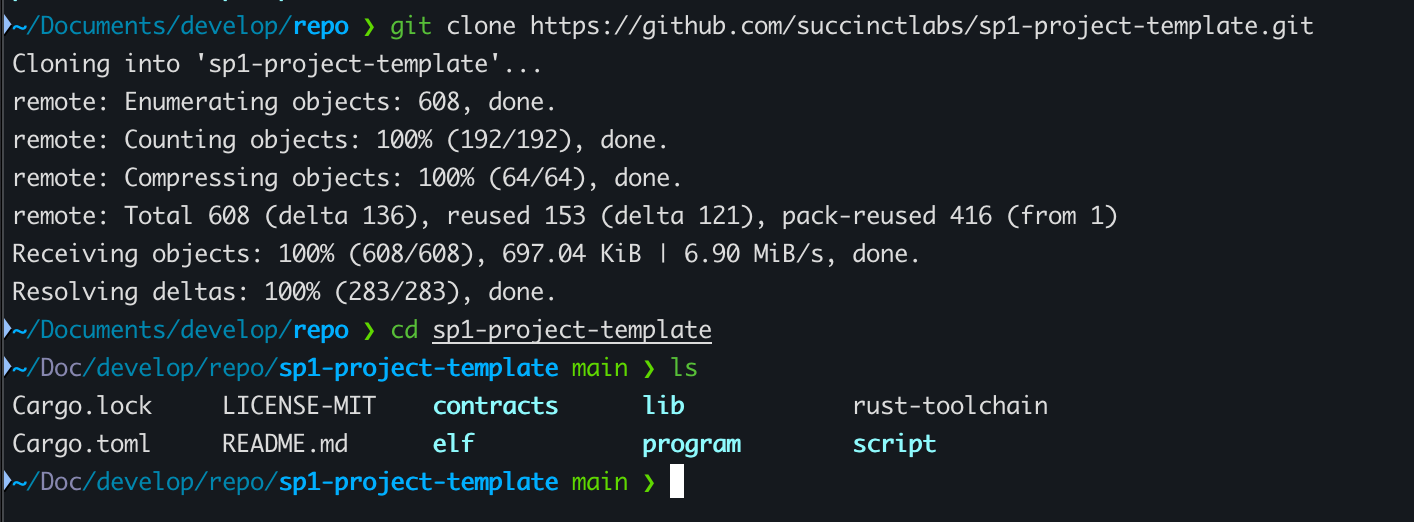
git clone https://github.com/succinctlabs/sp1-project-template.git
Project Overview
새 프로젝트는 아래와 같은 폴더 구조를 가지고 있습니다.
.
├── program
│   ├── Cargo.lock
│   ├── Cargo.toml
│   ├── elf
│   │   └── riscv32im-succinct-zkvm-elf
│   └── src
│       └── main.rs
├── rust-toolchain
└── script
    ├── Cargo.lock
    ├── Cargo.toml
    ├── build.rs
    └── src
        └── bin
            ├── prove.rs
            └── vkey.rs
프로젝트 내 2가지 폴더가 있습니다.
program: zkVM 내에서 검증할 소스코드script: Proof를 생성하고 검증하기 위한 소스코드
Generate Proofs
프로그램을 zkVM 에서 구동하기 위해 먼저 succinct Rust toolchain을 이용하여 RISC-V executable로 컴파일 해야합니다. 이를 ELF (Executable and Linkable Format) 라 합니다.
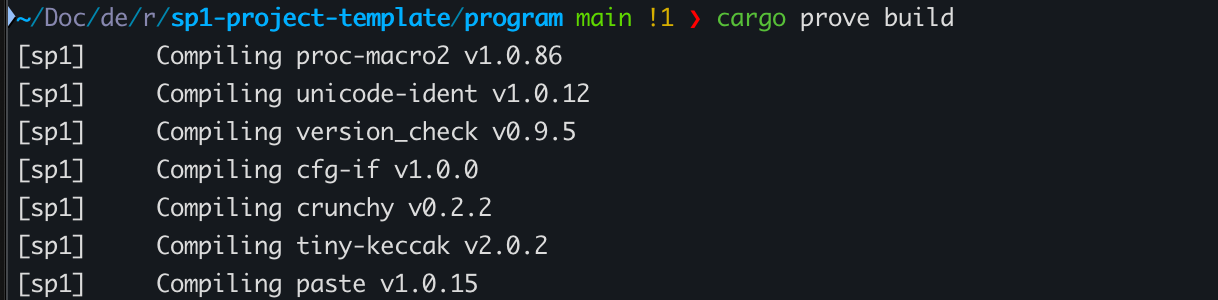
이를 컴파일 하기 위해서
cd program && cargo prove build
위 명령어를 수행하면 elf/riscv32im-succinct-zkvm-elf 경로에 결과물이 생성됩니다.

또한 script/build.rs 는 program 에 변경사항이 있을 때 자동으로 ELF에 대한 빌드를 수행하므로 매번 수동으로 cargo prove build 를 수행할 필요가 없습니다.
Proof를 생성하기 위해 script/build.rs 를 통해서 생성한 ELF 파일을 가져와 SP1 zkVM 위에서 실행합니다. script 디렉토리 내 이미 관련 된 코드가 작성되어 있습니다.
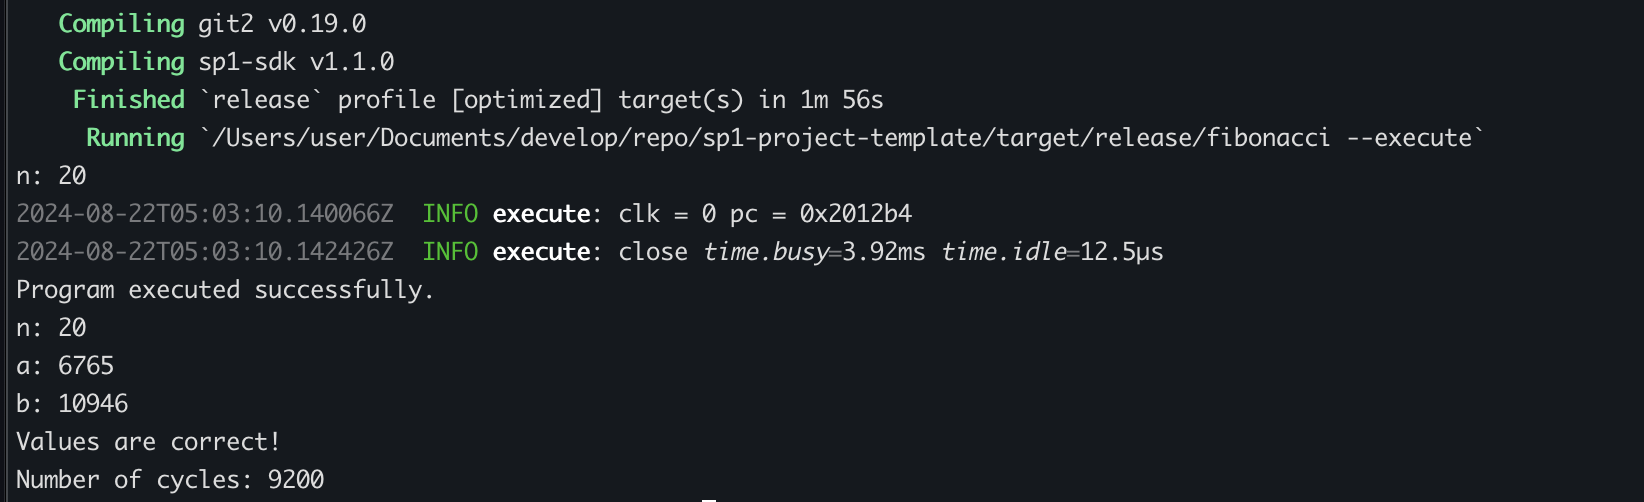
우선 —-execute 옵션을 이용하여 Proof를 생성하지 않고 프로그램을 실행할 수 있습니다.
cd script
RUST_LOG=info cargo run --release -- --execute
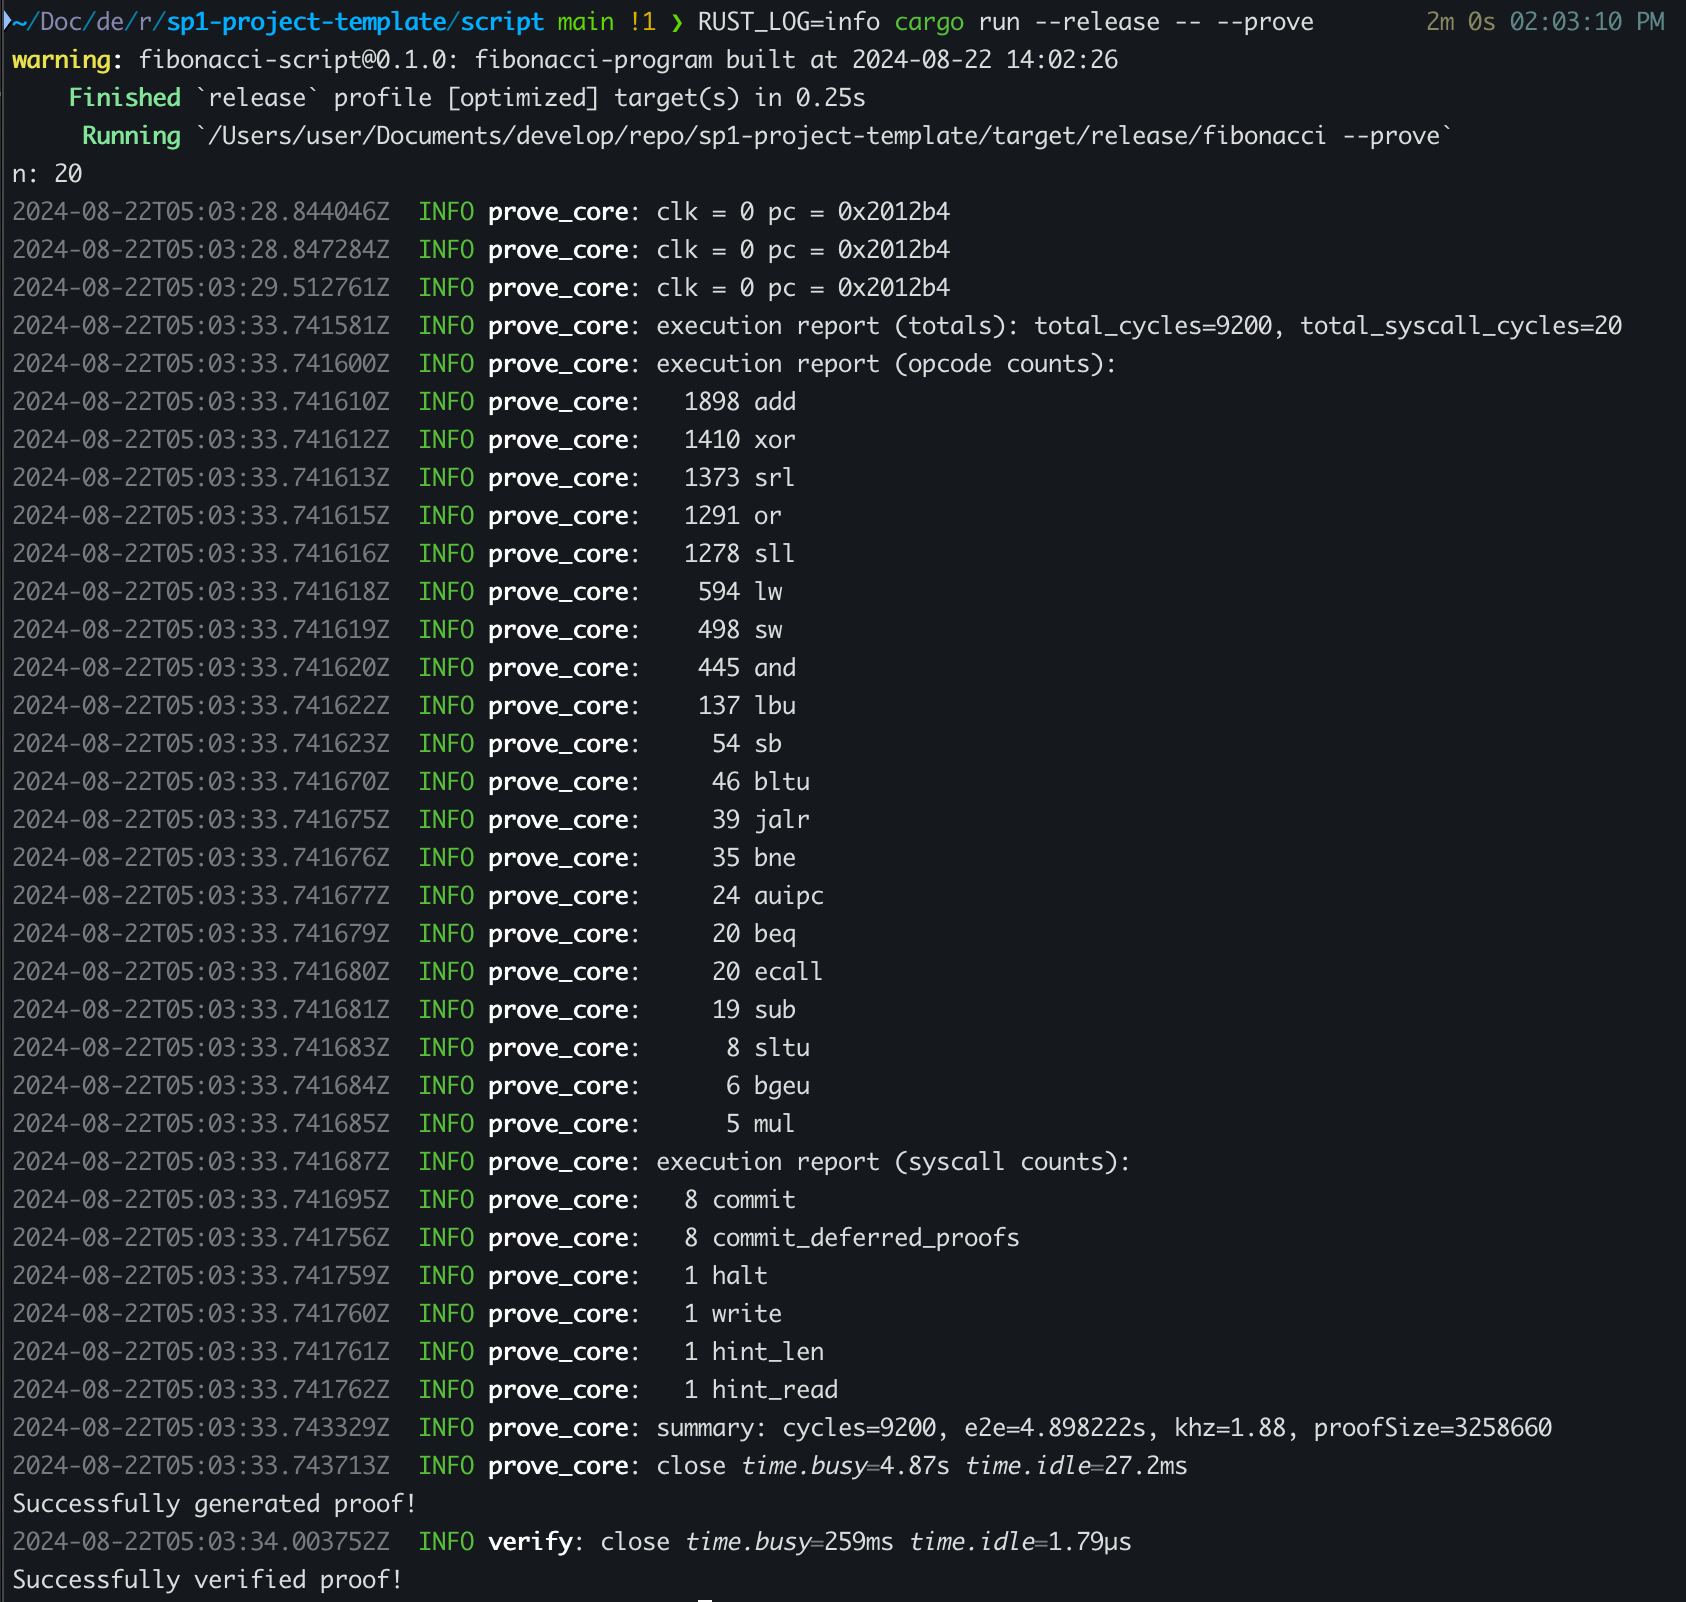
--prove 옵션을 사용하여 Proof를 생성하고 이를 저장할 수 있습니다.
cd script
RUST_LOG=info cargo run --release -- --prove
Proof Generation Requirements
Local Proving
로컬에서 SP1 Proof를 생성하기 위해서 하드웨어 요구 스펙이 있습니다. 이는 Proof Type에 따라 다릅니다.
| Mock / Network | Core / Compress | PLONK (EVM) | |
|---|---|---|---|
| CPU | 1+, single-core perf matters | 16+, more is better | 32+, more is better |
| Memory | 8GB+, more is better | 32GB+, more if you have more cores | 128GB+ (for PLONK) |
| Disk | 20GB+ | 20GB+ | 100GB+ (for trusted setup) |
| EVM Compatible | ✅ | ❌ | ✅ |
Writing Programs
Setup
Create Project with CLI
Create an SP1 Project 의 Option 1 에 명시한 대로 아래 명령어를 통해 프로젝트를 생성하는 방법을 추천합니다.
cargo prove new <name>
cd <name>
Basic
Example: Fibonacci
https://github.com/succinctlabs/sp1/blob/main/examples/fibonacci/program/src/main.rs 에 있는 Fibonacci를 예시로 설명합니다.
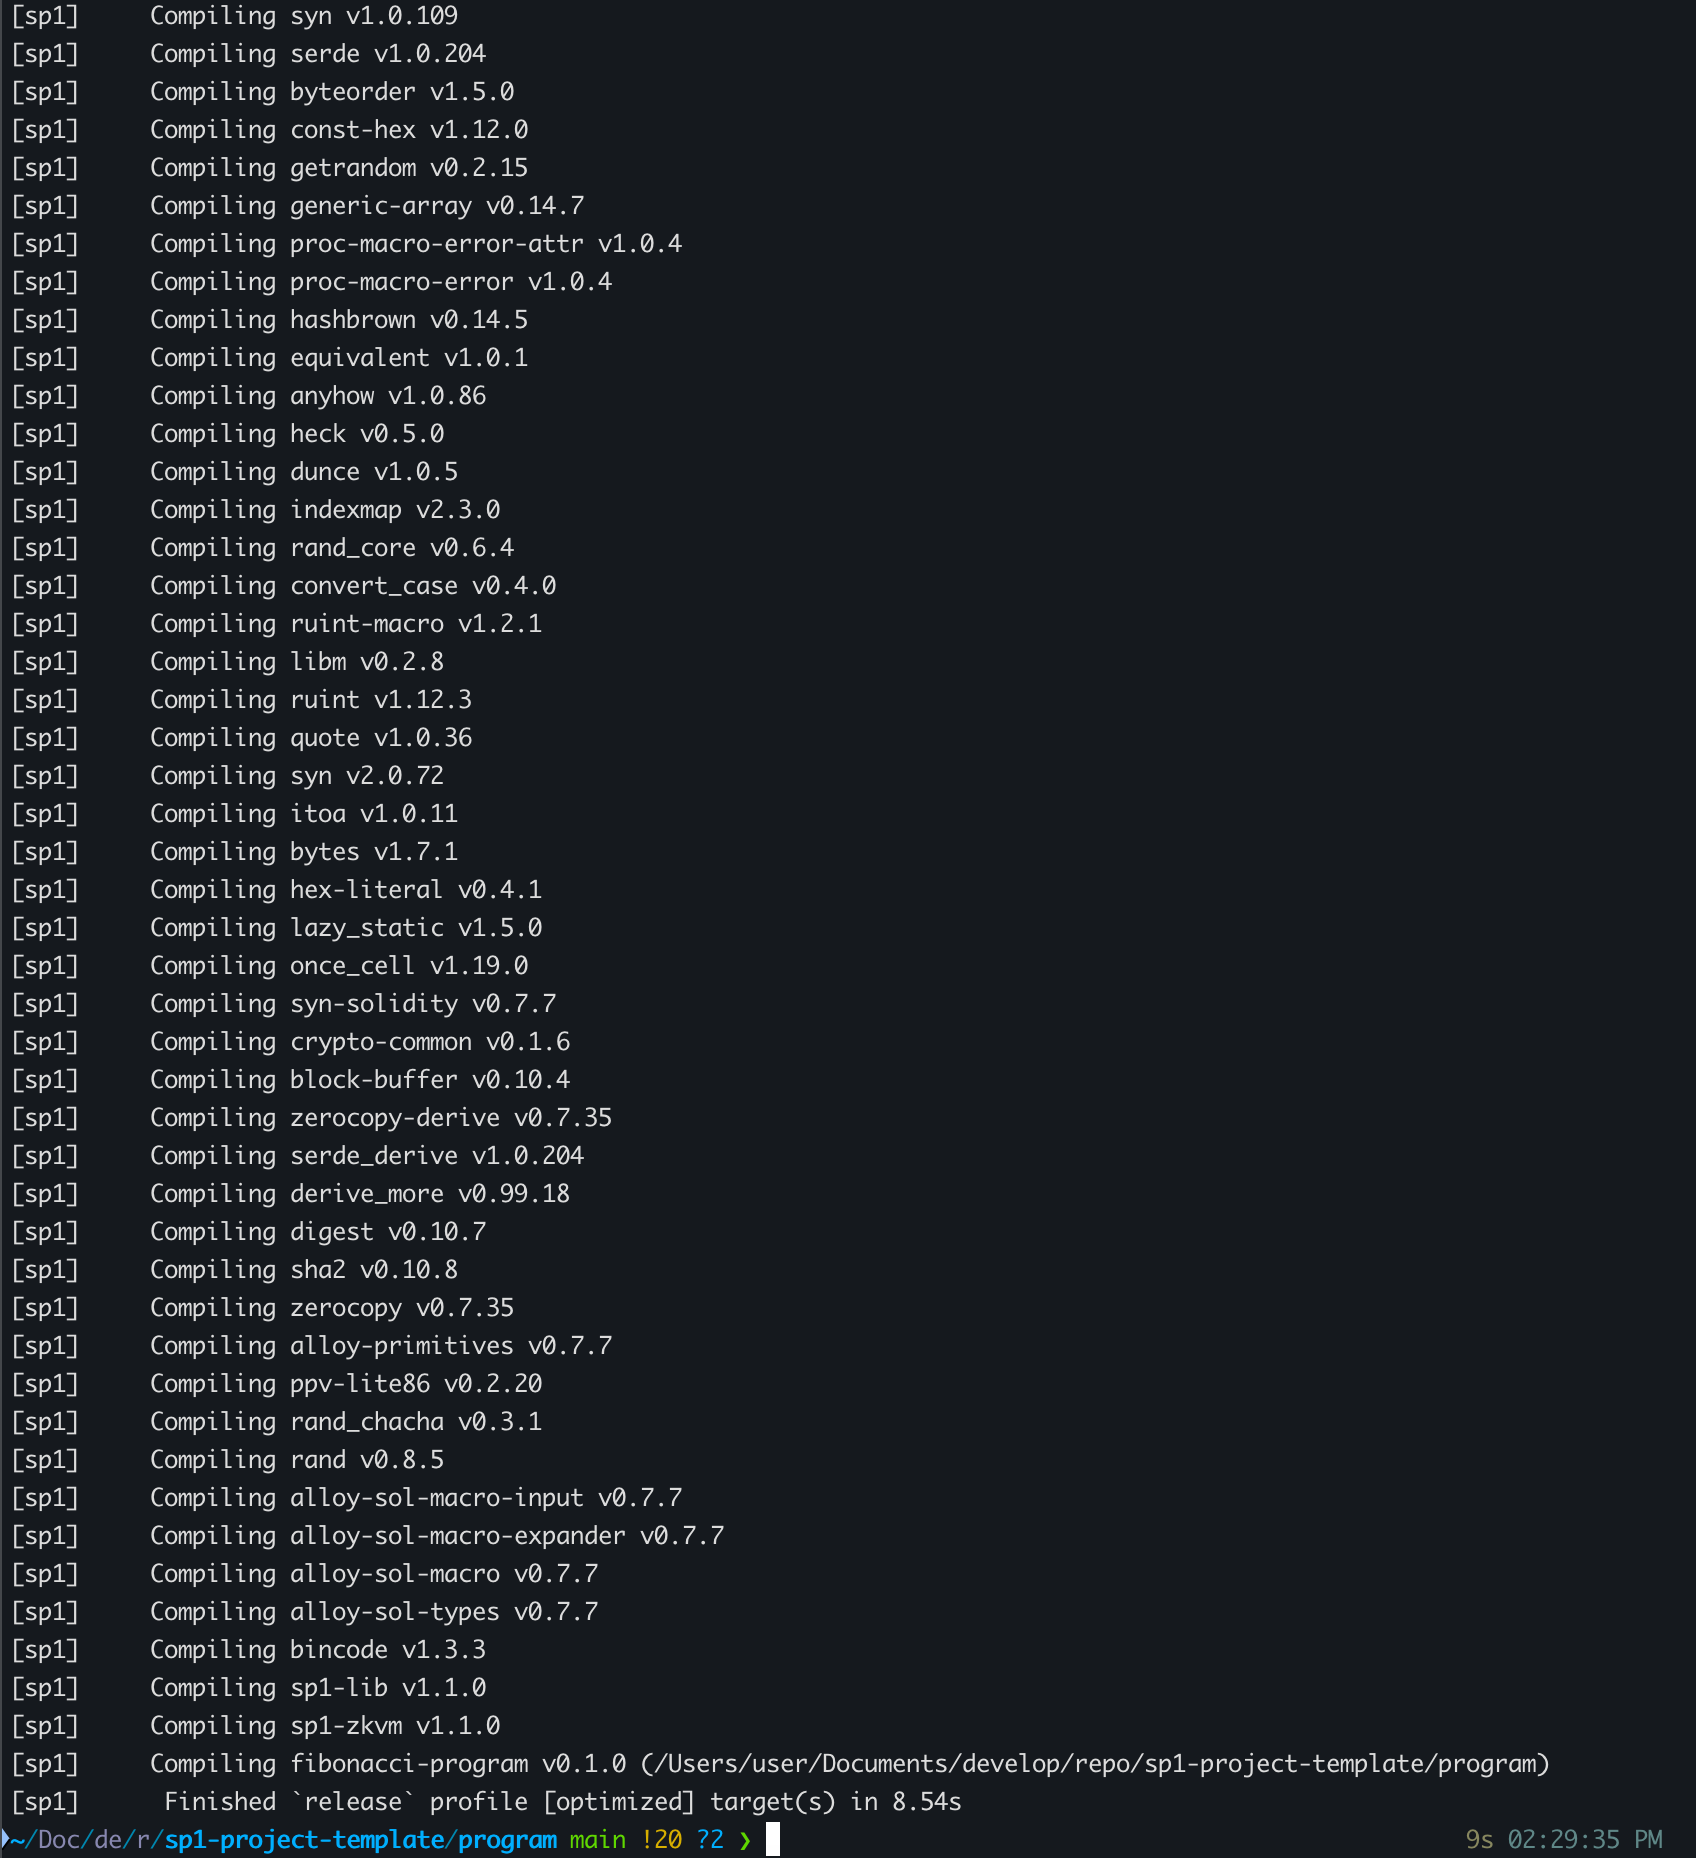
Compiling Programs
Compile with CLI
SP1 프로그램을 작성 했다면 zkVM에서 실행할 수 있도록 ELF로 컴파일 해야합니다. 이는 cargo prove 명령어로 수행할 수 있습니다.

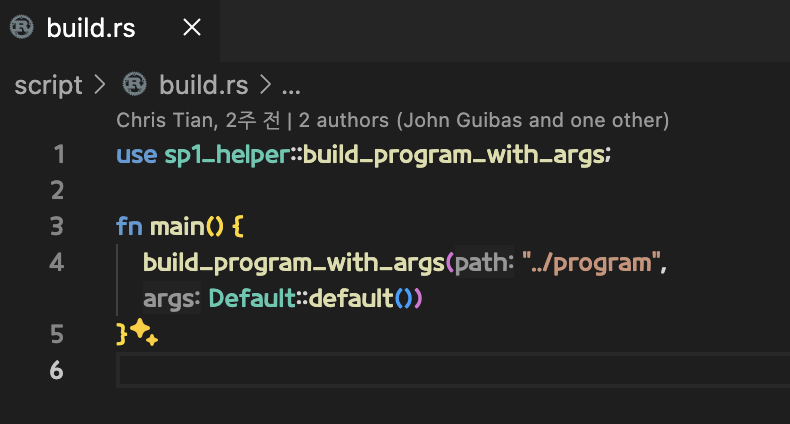
Build Script
코드를 변경할 때 자동으로 빌드를 수행하도록 하기 위해서 script 디렉토리에 build.rs 를 구성해야합니다.
use sp1_helper::build_program_with_args;

fn main() {
    build_program_with_args("../program", Default::default())
}
혹은 BuildArgs 구조체를 사용해 다양한 빌드 옵션을 구성할 수 있습니다
use sp1_helper::{build_program_with_args, BuildArgs};

fn main() {
    let args = BuildArgs {
        docker: true,
        output_directory: "./fibonacci-program".to_string(),
        ..Default::default()
    };
    build_program_with_args("../program", &args);
}
Inputs and Outputs
Real World Application에서 zero-knowledge proof를 사용할 때 대부분은 어떤 컨텍스트에 대해서 입출력에 대해서 검증하려고 하는 경우가 많다. 예를 들어
- Rollups : Tx 목록이 주어질 때 blockchain의 상태를 검증
- Coprocessors : block header가 주어질 때 smart contracts내 일부 스토리지에 대한 historical state를 검증
Reading Data
sp1_zkvm::io::read::<T> 메소드를 사용하여 데이터를 읽습니다. Read한 데이터는 기본적으로 Verifier에게 공개되지 않습니다.
let a = sp1_zkvm::io::read::<u32>();
let b = sp1_zkvm::io::read::<u64>();
let c = sp1_zkvm::io::read::<String>();
T 는 반드시 serde::Serialize 와 serde::Deserialize trait을 구현해야 합니다. 만약 byte를 직접 Read할 경우엔 sp1_zkvm::io::read_vec 메소드를 사용할 수 있습니다.
let my_vec = sp1_zkvm::io::read_vec();
Committing Data
데이터를 Commit 하면 데이터를 Verifier에게 공개하게 됩니다. 이는 sp1_zkvm::io::commit::<T> 메소드를 사용합니다.
sp1_zkvm::io::commit::<u32>(&a);
sp1_zkvm::io::commit::<u64>(&b);
sp1_zkvm::io::commit::<String>(&c);
T 는 반드시 serde::Serialize 와 serde::Deserialize trait을 구현해야 합니다. 만약 byte를 직접 Commit할 경우엔 sp1_zkvm::io::write_slice 메소드를 사용할 수 있습니다.
let mut my_slice = [0_u8; 32];
sp1_zkvm::io::commit_slice(&my_slice);
Creating Serializable Types
간단한 매크로를 사용하여 serde::Serialize 와 serde::Deserialize를 구현할 수 있습니다.
use serde::{Serialize, de::Deserialize};

#[derive(Serialize, Deserialize)]
struct MyStruct {
    a: u32,
    b: u64,
    c: String
}
Example
#![no_main]
sp1_zkvm::entrypoint!(main);

use serde::{Deserialize, Serialize};

#[derive(Serialize, Deserialize, Debug, PartialEq)]
struct MyPointUnaligned {
    pub x: usize,
    pub y: usize,
    pub b: bool,
}

pub fn main() {
    let p1 = sp1_zkvm::io::read::<MyPointUnaligned>();
    println!("Read point: {:?}", p1);

    let p2 = sp1_zkvm::io::read::<MyPointUnaligned>();
    println!("Read point: {:?}", p2);

    let p3: MyPointUnaligned = MyPointUnaligned {
        x: p1.x + p2.x,
        y: p1.y + p2.y,
        b: p1.b && p2.b,
    };
    println!("Addition of 2 points: {:?}", p3);
    sp1_zkvm::io::commit(&p3);
}
Precompiles
Precompiles은 SP1 zkVM에 내장되어 있으며 타원곡선 및 해시함수 등 일반적으로 사용하는 연산에 대해 가속화합니다.
zkVM 내부에서 Precompiles는 ecall RISC-V 명령어를 통해 실행되는 system call로 노출됩니다. 각 Precompiles는 고유한 시스템 호출 번호를 가지고 있습니다.
Specification
//! Syscalls for the SP1 zkVM.
//!
//! Documentation for these syscalls can be found in the zkVM entrypoint
//! `sp1_zkvm::syscalls` module.

pub mod bls12381;
pub mod bn254;
pub mod ed25519;
pub mod io;
pub mod secp256k1;
pub mod unconstrained;
pub mod utils;
#[cfg(feature = "verify")]
pub mod verify;

extern "C" {
    /// Halts the program with the given exit code.
    pub fn syscall_halt(exit_code: u8) -> !;

    /// Writes the bytes in the given buffer to the given file descriptor.
    pub fn syscall_write(fd: u32, write_buf: *const u8, nbytes: usize);

    /// Reads the bytes from the given file descriptor into the given buffer.
    pub fn syscall_read(fd: u32, read_buf: *mut u8, nbytes: usize);

    /// Executes the SHA-256 extend operation on the given word array.
    pub fn syscall_sha256_extend(w: *mut [u32; 64]);

    /// Executes the SHA-256 compress operation on the given word array and a given state.
    pub fn syscall_sha256_compress(w: *mut [u32; 64], state: *mut [u32; 8]);

    /// Executes an Ed25519 curve addition on the given points.
    pub fn syscall_ed_add(p: *mut [u32; 16], q: *const [u32; 16]);

    /// Executes an Ed25519 curve decompression on the given point.
    pub fn syscall_ed_decompress(point: &mut [u8; 64]);

    /// Executes an Sepc256k1 curve addition on the given points.
    pub fn syscall_secp256k1_add(p: *mut [u32; 16], q: *const [u32; 16]);

    /// Executes an Secp256k1 curve doubling on the given point.
    pub fn syscall_secp256k1_double(p: *mut [u32; 16]);

    /// Executes an Secp256k1 curve decompression on the given point.
    pub fn syscall_secp256k1_decompress(point: &mut [u8; 64], is_odd: bool);

    /// Executes a Bn254 curve addition on the given points.
    pub fn syscall_bn254_add(p: *mut [u32; 16], q: *const [u32; 16]);

    /// Executes a Bn254 curve doubling on the given point.
    pub fn syscall_bn254_double(p: *mut [u32; 16]);

    /// Executes a BLS12-381 curve addition on the given points.
    pub fn syscall_bls12381_add(p: *mut [u32; 24], q: *const [u32; 24]);

    /// Executes a BLS12-381 curve doubling on the given point.
    pub fn syscall_bls12381_double(p: *mut [u32; 24]);

    /// Executes the Keccak-256 permutation on the given state.
    pub fn syscall_keccak_permute(state: *mut [u64; 25]);

    /// Executes an uint256 multiplication on the given inputs.
    pub fn syscall_uint256_mulmod(x: *mut [u32; 8], y: *const [u32; 8]);

    /// Enters unconstrained mode.
    pub fn syscall_enter_unconstrained() -> bool;

    /// Exits unconstrained mode.
    pub fn syscall_exit_unconstrained();

    /// Defers the verification of a valid SP1 zkVM proof.
    pub fn syscall_verify_sp1_proof(vkey: &[u32; 8], pv_digest: &[u8; 32]);

    /// Returns the length of the next element in the hint stream.
    pub fn syscall_hint_len() -> usize;

    /// Reads the next element in the hint stream into the given buffer.
    pub fn syscall_hint_read(ptr: *mut u8, len: usize);

    /// Allocates a buffer aligned to the given alignment.
    pub fn sys_alloc_aligned(bytes: usize, align: usize) -> *mut u8;

    /// Decompresses a BLS12-381 point.
    pub fn syscall_bls12381_decompress(point: &mut [u8; 96], is_odd: bool);

    /// Computes a big integer operation with a modulus.
    pub fn sys_bigint(
        result: *mut [u32; 8],
        op: u32,
        x: *const [u32; 8],
        y: *const [u32; 8],
        modulus: *const [u32; 8],
    );
}
Cycle Tracking
프로그램을 작성할때 이 프로그램이 엄라나 많은 RISC-V cycle을 사용하는지 아는 것은 성능 파악을 하는데 매우 중요합니다. SP1은 프로그램의 일부에서 사용된 RISC-V cycle을 추적할 수 있는 방법을 제공합니다.
Tracking Cycles with Annotations
프로그램의 일부에서 사용된 사이클 수를 추적하려면 println!("cycle-tracker-start: block name")+ println!("cycle-tracker-end: block name")문장(블록 이름은 시작과 끝 사이에서 동일해야 함)을 프로파일링하려는 프로그램 부분 주위에 넣거나 #[sp1_derive::cycle_tracker]함수에서 매크로를 사용할 수 있습니다.
//! A simple program that takes a number `n` as input, and writes the `n-1`th and `n`th fibonacci
//! number as an output.

// These two lines are necessary for the program to properly compile.
//
// Under the hood, we wrap your main function with some extra code so that it behaves properly
// inside the zkVM.
#![no_main]
sp1_zkvm::entrypoint!(main);

pub fn main() {
    // Read an input to the program.
    //
    // Behind the scenes, this compiles down to a system call which handles reading inputs
    // from the prover.
    let n = sp1_zkvm::io::read::<u32>();

    // Write n to public input
    sp1_zkvm::io::commit(&n);

    println!("cycle-tracker-start: fibonacci");
    // Compute the n'th fibonacci number, using normal Rust code.
    let mut a = 0;
    let mut b = 1;
    for _ in 0..n {
        let mut c = a + b;
        c %= 7919; // Modulus to prevent overflow.
        a = b;
        b = c;
    }
    println!("cycle-tracker-end: fibonacci");

    // Write the output of the program.
    //
    // Behind the scenes, this also compiles down to a system call which handles writing
    // outputs to the prover.
    sp1_zkvm::io::commit(&a);
    sp1_zkvm::io::commit(&b);
}
이를 사용하기 위해서 sp1-derive 를 dependencies에 추가해야 합니다.
[dependencies]
sp1-derive = "1.1.0"
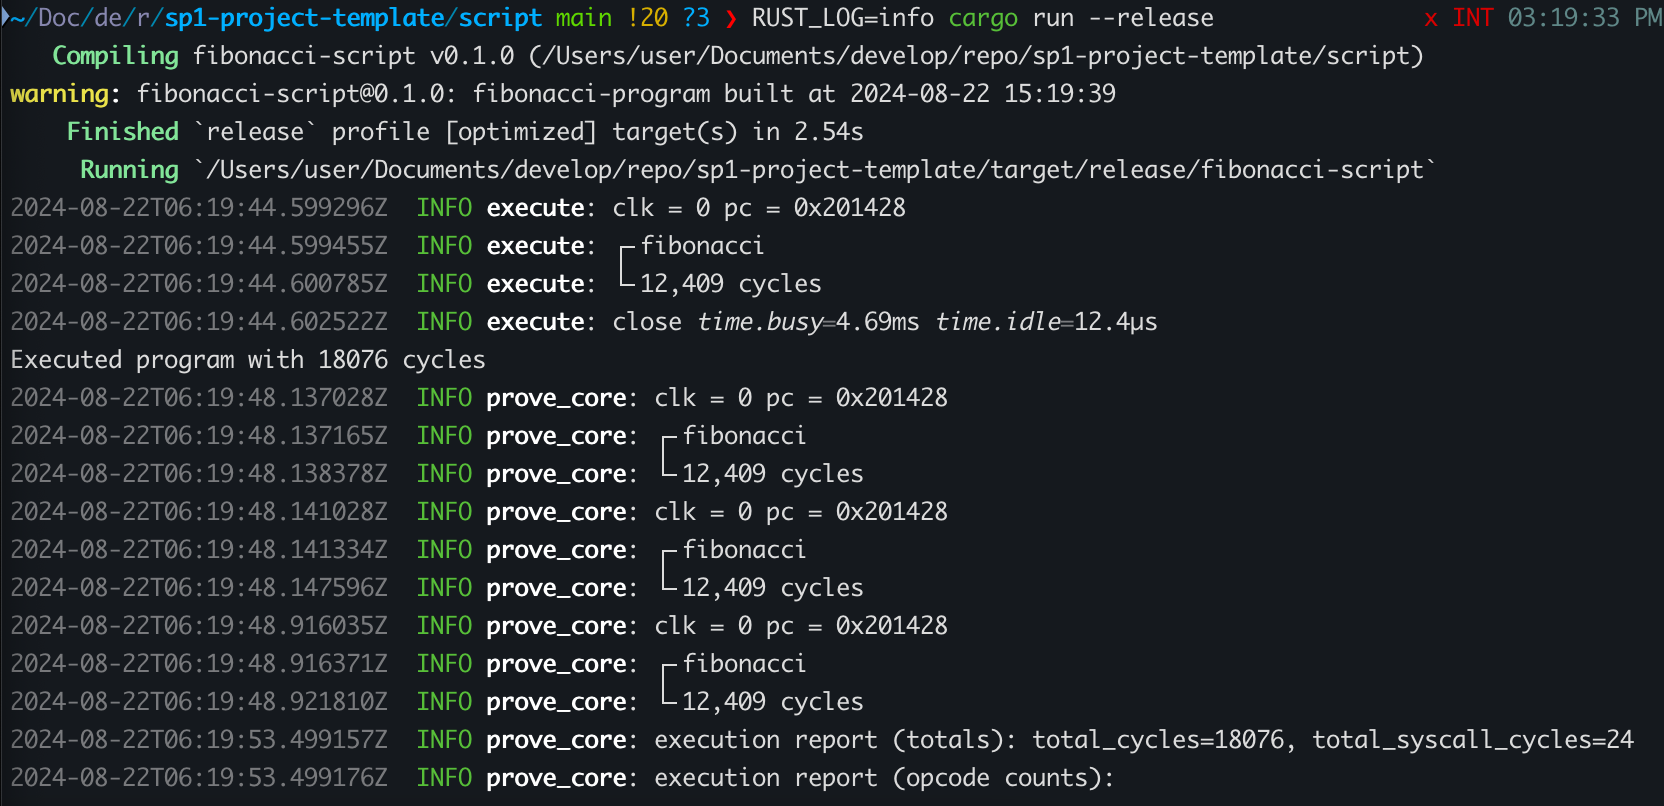
script 내부의 Proof 생성 부분에서 logger를 utils::setup_logger() 를 통해 설정하고 RUST_LOG=info cargo run --release 명령어를 수행하면 아래와 같은 결과를 확인할 수 있습니다.
Tracking Cycles with Tracing
cycle-tracker 어노테이션은 코드의 특정 부분에 대한 cycle을 추적하는 간편한 방법 입니다. 하지만 때로는 모든 기능에 어노테이션을 작성하는 것 보단 프로그램 전체에 대해 추적하는 것이 더 편한 방법일 수 있습니다.
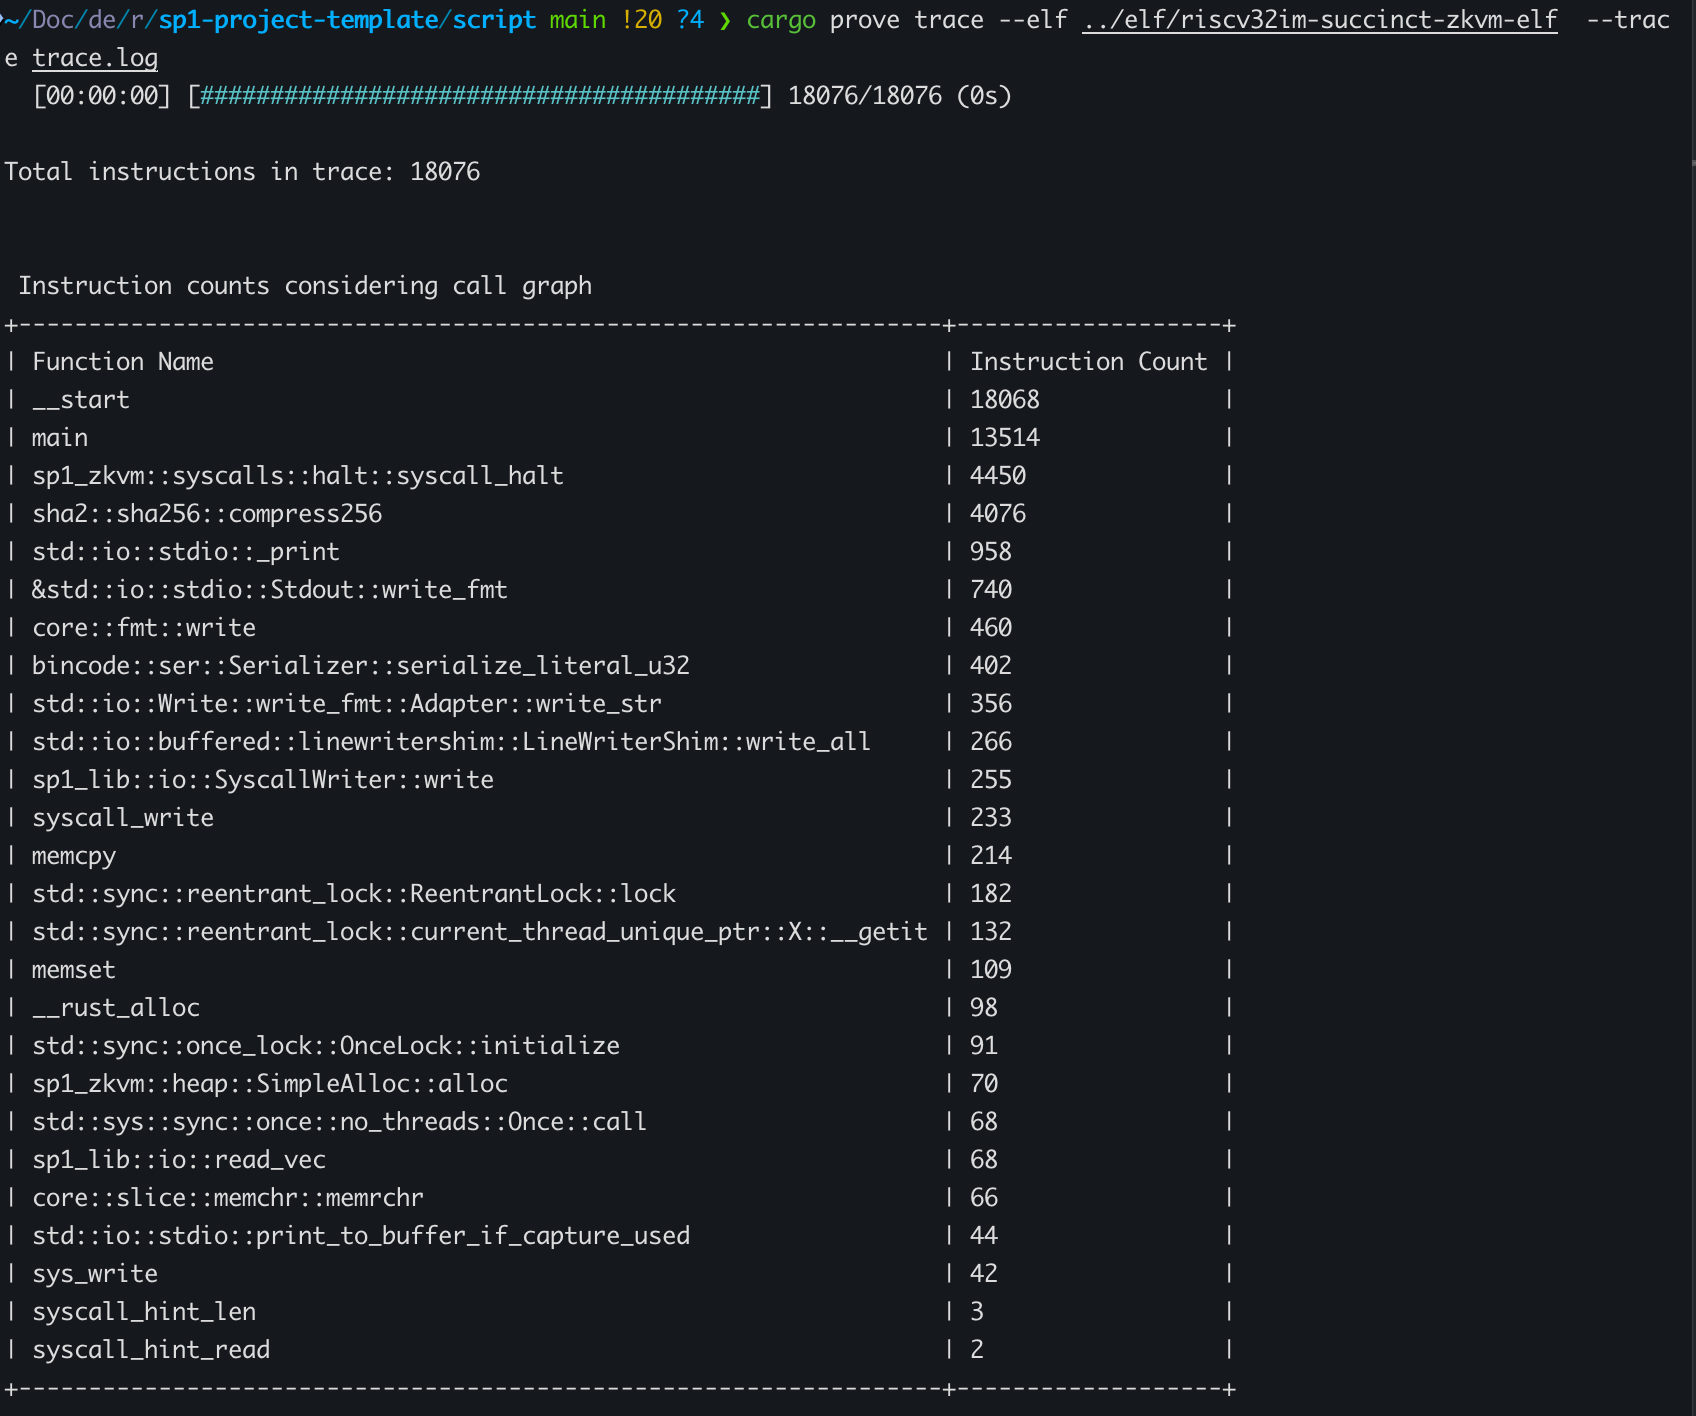
이를 위해서 script 디렉토리에서 아래 명령어를 수행하는 것으로 trace file을 생성할 수 있습니다.
TRACE_FILE=trace.log RUST_LOG=info cargo run --releases
그 다음 cargo prove CLI를 통해 trace file을 분석할 수 있습니다.
cargo prove trace --elf <path_to_program_elf> --trace <path_to_trace_file>
Proof Aggregation
SP1은 proof aggregation & recursion 을 지원합니다. 이는 SP1 내에서 SP1 Proof를 검증할 수 있도록 합니다.
- 여러 SP1 Proof를 하나의 SP1 Proof으로 aggregate 함으로써 온체인 검증 코스트를 줄일 수 있습니다.
- 여러 개의 증명으로 나눠진 로직을 증명합니다. 예를 들어, 각 블록을 개별적으로 증명하고 이 증명들을 집계하여 일련의 블록에 대한 최종 증명을 생성함으로써 롤업의 상태 전이 함수에 대한 진술을 증명하는 것과 같습니다.
SP1에서 어떤식으로 이를 수행하는지는 Example을 참고하세요
Verifying Proofs inside the zkVM
zkVM 내부에서 proof를 검증하기 위해 sp1_zkvm::lib::verify::verify_proof 함수를 사용합니다.
sp1_zkvm::lib::verify::verify_proof(vkey, public_values_digest);
Generating Proofs with Aggregation
SP1 zkVM 에 이미 존재하는 proof를 입력으로 제공하려면 SP1Stdin 를 사용할 수 있습니다.
let (input_pk, input_vk) = client.setup(PROOF_INPUT_ELF);
let (aggregation_pk, aggregation_vk) = client.setup(AGGREGATION_ELF);

// Generate a proof that will be recursively verified / aggregated. Note that we use the "compressed"
// proof type, which is necessary for aggregation.
let mut stdin = SP1Stdin::new();
let input_proof = client
    .prove(&input_pk, stdin)
    .compressed()
    .run()
    .expect("proving failed");

// Create a new stdin object to write the proof and the corresponding verifying key to.
let mut stdin = SP1Stdin::new();
stdin.write_proof(input_proof, input_vk);

// Generate a proof that will recusively verify / aggregate the input proof.
let aggregation_proof = client
    .prove(&aggregation_pk, stdin)
    .compressed()
    .run()
    .expect("proving failed");
Output
Generating Proofs
Setup
Create Project with CLI
Create an SP1 Project 의 Option 1 에 명시한 대로 아래 명령어를 통해 프로젝트를 생성하는 방법을 추천합니다.
cargo prove new <name>
cd <name>
Basics
proof를 생성하는데 필요한 메소드는 sp1_sdk crate에 포함되어 있습니다. ProverClient 를 사용하여 proving key와 verifying key를 설정한 다음 execute, prove , verify 메소드를 사용하여 proof를 생성하거나 증명할 수 있습니다.
Example
use sp1_sdk::{utils, ProverClient, SP1ProofWithPublicValues, SP1Stdin};

/// The ELF we want to execute inside the zkVM.
const ELF: &[u8] = include_bytes!("../../program/elf/riscv32im-succinct-zkvm-elf");

fn main() {
    // Setup logging.
    utils::setup_logger();

    // Create an input stream and write '500' to it.
    let n = 1000u32;

    // The input stream that the program will read from using `sp1_zkvm::io::read`. Note that the
    // types of the elements in the input stream must match the types being read in the program.
    let mut stdin = SP1Stdin::new();
    stdin.write(&n);

    // Create a `ProverClient` method.
    let client = ProverClient::new();

    // Execute the program using the `ProverClient.execute` method, without generating a proof.
    let (_public_values, report) = client.execute(ELF, stdin.clone()).run().unwrap();
    println!(
        "Executed program with {} cycles",
        report.total_instruction_count()
    );

    // Generate the proof for the given program and input.
    let client = ProverClient::new();
    let (pk, vk) = client.setup(ELF);
    let mut proof = client.prove(&pk, stdin).run().unwrap();

    println!("generated proof");

    // Read and verify the output.
    // Note that this output is read from values commited to in the program
    // using `sp1_zkvm::io::commit`.
    let _ = proof.public_values.read::<u32>();
    let a = proof.public_values.read::<u32>();
    let b = proof.public_values.read::<u32>();

    println!("a: {}", a);
    println!("b: {}", b);

    // Verify proof and public values
    client.verify(&proof, &vk).expect("verification failed");

    // Test a round trip of proof serialization and deserialization.
    proof
        .save("proof-with-pis.bin")
        .expect("saving proof failed");
    let deserialized_proof =
        SP1ProofWithPublicValues::load("proof-with-pis.bin").expect("loading proof failed");

    // Verify the deserialized proof.
    client
        .verify(&deserialized_proof, &vk)
        .expect("verification failed");

    println!("successfully generated and verified proof for the program!")
}
Proof Types
SP1 zkVM에서 생성할 수 있는 여러 종류의 Proof type이 있습니다. 각 type은 증명 생성 시간, 검증 cost, proof 크기 등에서 차이가 있습니다.
Core (Default)
기본 prover 모드는 execution 사이즈에 비례하는 STARK 증명을 생성합니다. 검증 비용이나 proof 사이즈에 대해 크게 신경쓰지 않아도 될 때 사용합니다.
let client = ProverClient::new();
client.prove(&pk, stdin).run().unwrap();
Compressed
compressed prover 모드는 일정한 크기의 STARK 증명을 생성합니다. 검증 비용이나 Proof 사이즈에 대해 신경써야 할 경우 사용하세요.
이 모드는 SP1 내에서 SP1 Proof를 재귀적으로 검증하고자 하는 애플리케이션에 유용합니다.
let client = ProverClient::new();
client.prove(&pk, stdin).compressed().run().unwrap();
PLONK
PLONK prover 모드는 매우 작은 크기의 Proof size와 낮은 검증 비용을 가진 SNARK Proof를 생성합니다. 이 모드는 약 300,000 Gas (ethereum) 정도를 소모하여 온체인에서 검증할 수 있을 정도의 증명을 생성하는데 사용합니다.
let client = ProverClient::new();
client.prove(&pk, stdin).plonk().run().unwrap();
Onchain Verification
Setup
SP1 프로젝트 템플릿 에 Onchain verification 에 필요한 코드들이 포함되어 있습니다.
- program 폴더는 Solidity 에서 디코딩 할 수 있는 출력을 작성하는 법을 보여 줍니다.
- script 폴더는 SDK 를 사용하여 증명을 생성하고 이를 바이너리로 저장하는 방법을 보여 줍니다.
- contract 폴더는 Solidity 를 사용하여 체인 상에서 증명을 검증하는 방법을 보여 줍니다.
Generating SP1 Proofs for Onchain Verification
기본적으로 SP1에서 생성된 증명은 크기가 일정하지 않고 Ethereum 에서 STARK Proof 에 대한 검증이 cost 가 많이 들기 때문에 체인 상에서 검증할 수 없습니다. 체인 상에서 검증할 수 있는 검증을 생성하기 위해서 성능이 뛰어난 STARK recursion 을 사용해 단일 STARK Proof로 만들고 이를 SNARK Proof로 래핑합니다. plonk Proof type 옵션을 사용하면 위 처럼 동작하는 방식으로 Proof를 생성할 수 있습니다.
Example
use sp1_sdk::{utils, ProverClient, SP1Stdin};

/// The ELF we want to execute inside the zkVM.
const ELF: &[u8] = include_bytes!("../../program/elf/riscv32im-succinct-zkvm-elf");

fn main() {
    // Setup logging.
    utils::setup_logger();

    // Create an input stream and write '500' to it.
    let n = 500u32;

    let mut stdin = SP1Stdin::new();
    stdin.write(&n);

    // Generate the proof for the given program and input.
    let client = ProverClient::new();
    let (pk, vk) = client.setup(ELF);
    let proof = client.prove(&pk, stdin).plonk().run().unwrap();

    println!("generated proof");

    // Get the public values as bytes.
    let public_values = proof.public_values.raw();
    println!("public values: {:?}", public_values);

    // Get the proof as bytes.
    let solidity_proof = proof.raw();
    println!("proof: {:?}", solidity_proof);

    // Verify proof and public values
    client.verify(&proof, &vk).expect("verification failed");

    // Save the proof.
    proof
        .save("proof-with-pis.bin")
        .expect("saving proof failed");

    println!("successfully generated and verified proof for the program!")
}
Solidity Verifier
SP1에서는 SP1 Proof를 온체인에서 검증하기 위한 컨트랙트를 제공합니다. 이 문서에서는 Foundry를 사용하여 작성합니다
Installation
forge install succinctlabs/sp1-contracts
Example
// SPDX-License-Identifier: MIT
pragma solidity ^0.8.20;

import {ISP1Verifier} from "@sp1-contracts/ISP1Verifier.sol";

/// @title Fibonacci.
/// @author Succinct Labs
/// @notice This contract implements a simple example of verifying the proof of a computing a
///         fibonacci number.
contract Fibonacci {
    /// @notice The address of the SP1 verifier contract.
    /// @dev This can either be a specific SP1Verifier for a specific version, or the
    ///      SP1VerifierGateway which can be used to verify proofs for any version of SP1.
    ///      For the list of supported verifiers on each chain, see:
    ///      https://github.com/succinctlabs/sp1-contracts/tree/main/contracts/deployments
    address public verifier;

    /// @notice The verification key for the fibonacci program.
    bytes32 public fibonacciProgramVKey;

    constructor(address _verifier, bytes32 _fibonacciProgramVKey) {
        verifier = _verifier;
        fibonacciProgramVKey = _fibonacciProgramVKey;
    }

    /// @notice The entrypoint for verifying the proof of a fibonacci number.
    /// @param _proofBytes The encoded proof.
    /// @param _publicValues The encoded public values.
    function verifyFibonacciProof(bytes calldata _publicValues, bytes calldata _proofBytes)
        public
        view
        returns (uint32, uint32, uint32)
    {
        ISP1Verifier(verifier).verifyProof(fibonacciProgramVKey, _publicValues, _proofBytes);
        (uint32 n, uint32 a, uint32 b) = abi.decode(_publicValues, (uint32, uint32, uint32));
        return (n, a, b);
    }
}
ISP1Verifier Interface
모든 verifier는 ISP1Verifier 인터페이스를 구현해야 합니다.
// SPDX-License-Identifier: MIT
pragma solidity ^0.8.20;

/// @title SP1 Verifier Interface
/// @author Succinct Labs
/// @notice This contract is the interface for the SP1 Verifier.
interface ISP1Verifier {
    /// @notice Verifies a proof with given public values and vkey.
    /// @dev It is expected that the first 4 bytes of proofBytes must match the first 4 bytes of
    /// target verifier's VERIFIER_HASH.
    /// @param programVKey The verification key for the RISC-V program.
    /// @param publicValues The public values encoded as bytes.
    /// @param proofBytes The proof of the program execution the SP1 zkVM encoded as bytes.
    function verifyProof(
        bytes32 programVKey,
        bytes calldata publicValues,
        bytes calldata proofBytes
    ) external view;
}
Troubleshooting
-
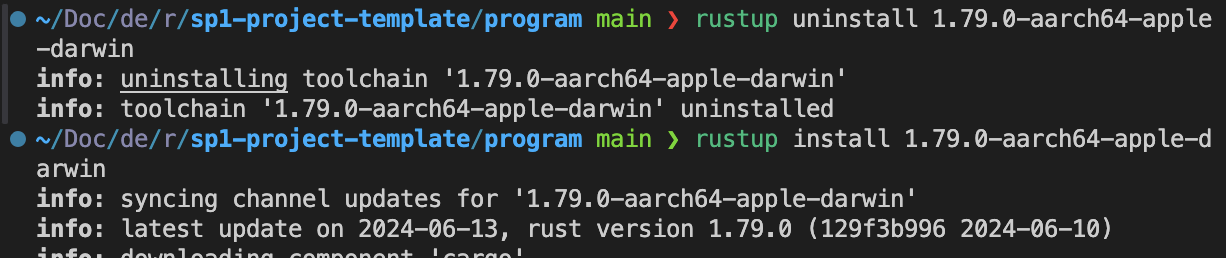
cargo prove build수행 시 cargo binary를 못 찾는 현상
- toolchain uninstall 후 install 재 수행 하여 해결
-
Proof Aggregation 실행 중 에러
Example 에 있는 aggregation을 템플릿에 옮겨 수행한 결과입니다.
에러 뜸
  2024-08-22T07:13:00.992561Z  INFO generate fibonacci proof n=10:prove_core: close time.busy=4.70s time.idle=23.9ms
  2024-08-22T07:15:09.054993Z  INFO generate fibonacci proof n=10: close time.busy=128s time.idle=4.73s
  2024-08-22T07:15:09.062977Z  INFO aggregate the proofs:prove_core: clk = 0 pc = 0x2013b4
  thread '<unnamed>' panicked at /Users/user/.cargo/registry/src/index.crates.io-6f17d22bba15001f/sp1-core-1.1.0/src/runtime/mod.rs:1197:13:
  Not all proofs were read. Proving will fail during recursion. Did you pass too many proofs in or forget to call verify_sp1_proof?
  note: run with `RUST_BACKTRACE=1` environment variable to display a backtrace
  thread 'main' panicked at /Users/user/.cargo/registry/src/index.crates.io-6f17d22bba15001f/sp1-core-1.1.0/src/utils/prove.rs:377:71:
  called `Result::unwrap()` on an `Err` value: Any { .. }
  2024-08-22T07:15:09.066269Z  INFO aggregate the proofs:prove_core: close time.busy=3.63ms time.idle=1.36ms
  2024-08-22T07:15:09.066537Z  INFO aggregate the proofs: close time.busy=11.5ms time.idle=1.04µs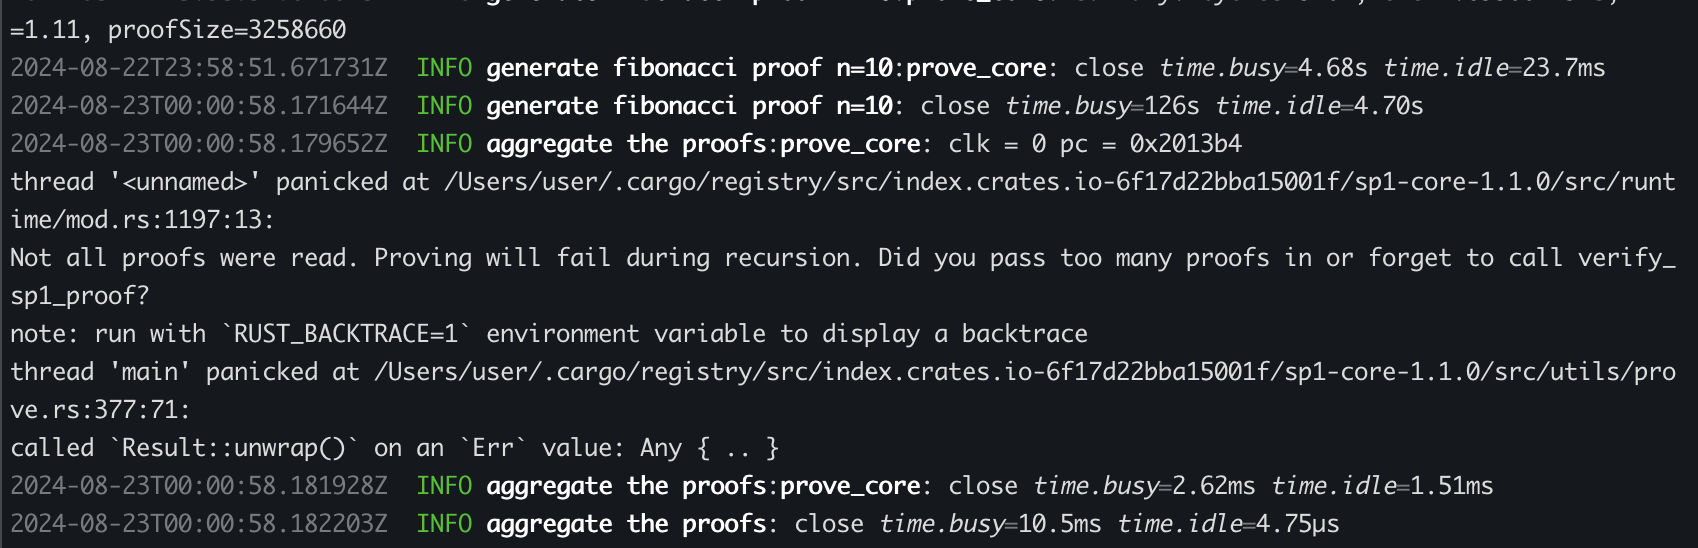
sp1을 그대로 복붙하니까 정상적으로 수행됨, 아마 ELF가 꼬여서 그런 것 같음
https://github.com/repository-warehouse/sp1-aggregation-example